

How To Transfer Photos From Camera To Android

Picture this. You're outside taking high-quality photos with your DSLR or mirrorless camera when you shoot a picture that you need to go online right away. Normally, you lot'd need a laptop to copy your files to before uploading, or a connected phone such as a Samsung Galaxy Photographic camera. Still, with a couple of cheap accessories and the right software, y'all tin can transfer those photos direct to an Android smartphone and upload them your favorite social media or cloud storage service in but a few taps.
What You Need
one. A USB SD Card reader. If you lot don't already take an SD card reader, yous can normally find one for $5 to $10. We used an IO Gear GFR204SD ($vii.99) for our tests.
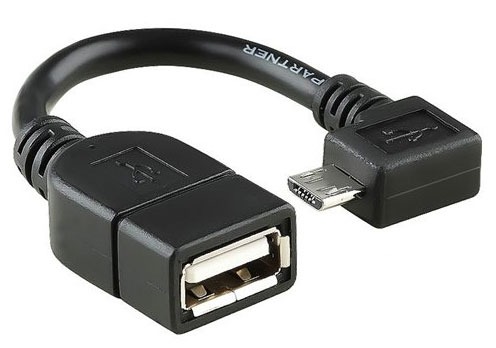
ii. A USB OTG Cable. A USB OTG ("on the get") cable has a microUSB male connector that goes to your telephone on ane end and a full-size USB female person connector on the other. These cables cost as little equally $two if you purchase them online.
3. A rooted Android phone. If your phone is non already rooted, yous can find instructions for your specific brand and model on sites such as theunlockr.com and forum.xda-developers.com.
MORE: 10 Best Apps for Rooted Android Devices
How to Connect and Transfer Camera Photos to Android
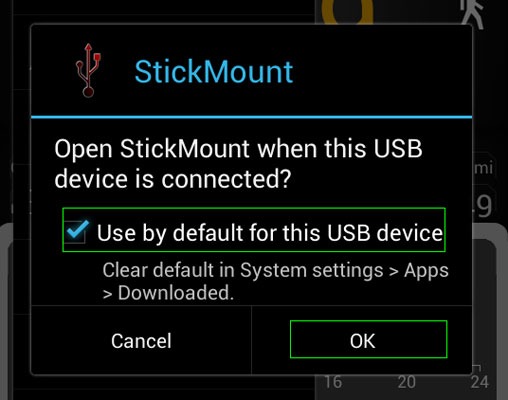
1. Install StickMount.
2. Put the SD card from your photographic camera in the bill of fare reader.
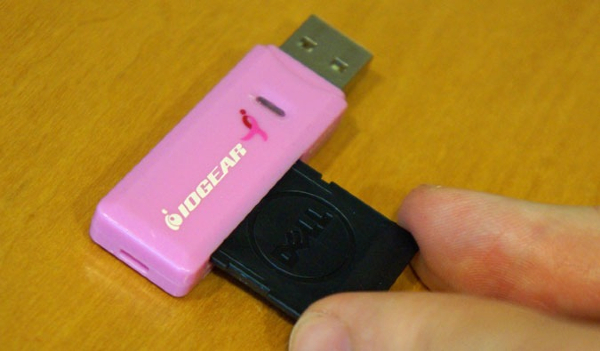
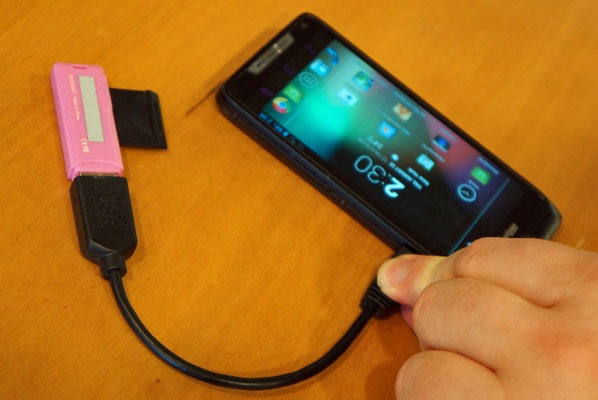
3. Connect the card reader to the OTG cable and the OTG cable to the phone.
4. Check Use By Default when prompted by Android.
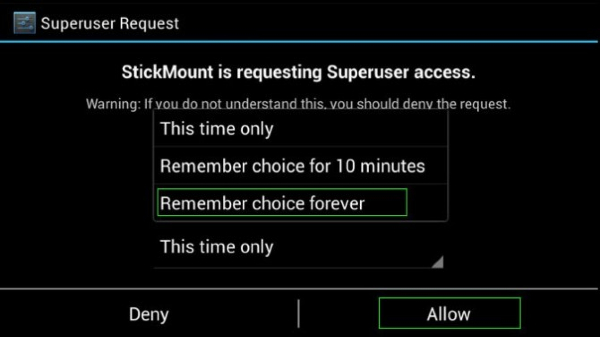
5. Select Remember Choice Forever when asked to give StickMount Superuser admission. StickMount volition at present accept the permissions it needs to mount any storage device you attach now and in the futurity.
6. Launch your file director. If y'all don't accept one, install Astro File Manager.
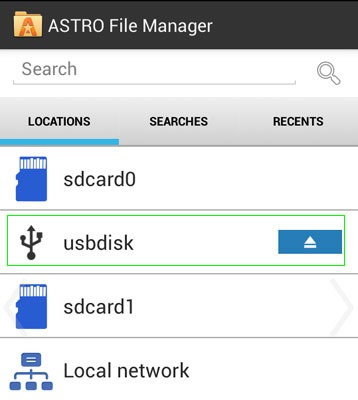
7. Scan the USB storage drive and locate the photos or videos you wish to copy from the SD carte.
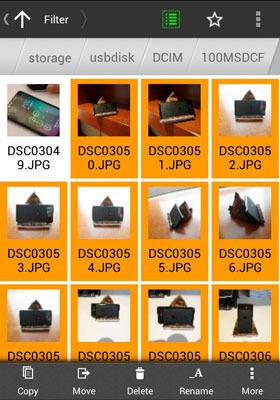
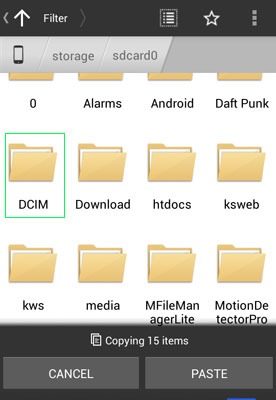
8. Copy the files to the DCIM folder on your phone. Though you can copy the files to any folder y'all want, we recommend the DCIM folder because that's the location where your telephone stores its own photos.
Enabling Automated Uploads
Though you tin always manually upload the pictures yous desire to share, information technology's even better to have your phone automatically dorsum your files up to the deject for y'all. Fortunately, only copying the files to your phone will trigger the automatic upload feature on popular applications such as Dropbox, Facebook and Google+. Here'south how you can enable automated photo backup on your favorite apps.
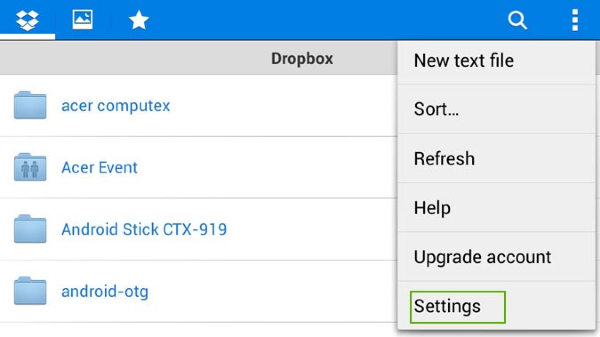
Enable Automatic Photo Upload on Dropbox for Android
1. Select Settings in the Dropbox App.
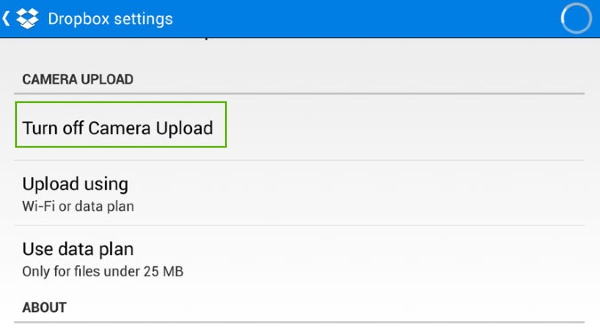
2. Make sure that photographic camera upload is on. If it is on, you will run into a card item that says "Plow off photographic camera upload." If it is off, that item will say "Turn on photographic camera upload."
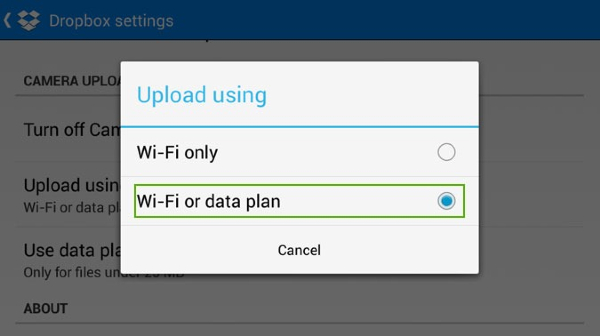
three. Ready Upload using to Wi-Fi or information plan if it is not already fix to that selection. If y'all are worried about exceeding your data cap, you can choose Wi-Fi Only but then your photos won't sync when are y'all out of hotspot range.
New photos will at present announced in the Camera Uploads subfolder of your dropbox as presently as you copy them.
Enable Automatic Photo Upload on Facebook
one. Swipe left in Facebook for Android. A menu volition appear.
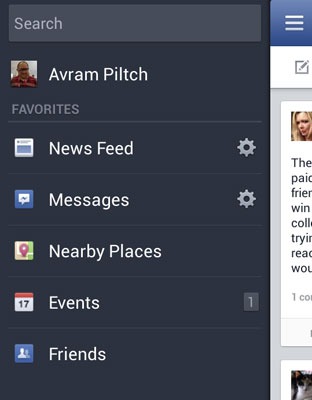
2. Tap app settings. You'll have to scroll downward to get it.
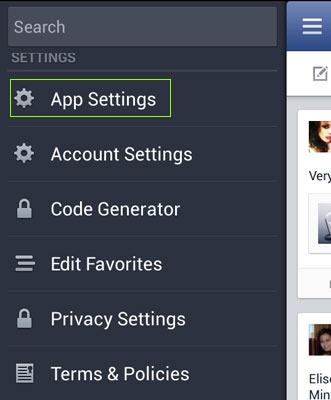
iii. Tap Sync Photos.

4. Select "Sync over Wi-Fi or cellular" if you want your photos to upload from anywhere. Choose "Sync over Wi-Fi only" if you are worried about exceeding your data cap.
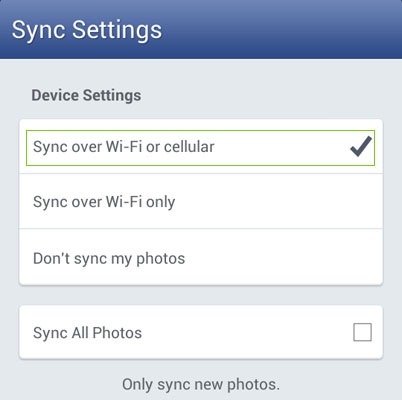
Your photos will start uploading to Facebook equally soon equally you copy them to the phone, but they will be set to individual unless and until you share them. To find the photos, tap Photos in the swipe-out carte du jour then select the Synced tab.

Turn on Google+ Auto Backup in Android
Google+ volition also upload photos to your account as presently as you lot copy them. To enable this feature:
1. Select settings in the Google+ app.
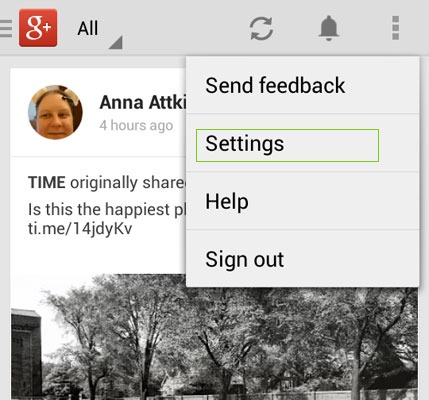
2. Tap Motorcar Backup.

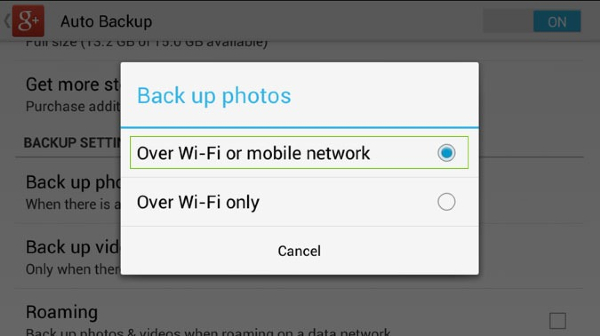
iii. Make sure the slider is set to On.
four. Tap Back up photos and select "Over Wi-Fi or mobile network" to make sure your photos will be uploaded from anywhere. If hitting your data cap is a concern, select Over Wi-Fi Merely.
five. Tap Support video and select an upload option.
Follow Avram Piltch @Geekinchief and on Google+. Follow u.s. @TomsGuide, on Facebook and on Google+.
Source: https://www.tomsguide.com/us/transfer-camera-photos-to-android-phone,news-21222.html
Posted by: kosstrumsess.blogspot.com
0 Response to "How To Transfer Photos From Camera To Android"
Post a Comment